Juniper network connect on Ubuntu 64 Bits Ubuntu 14.04 LTS Trusty Tahr
This is a step by step guide with clear explanations and screen shots to explain the set-up of Juniper network connect on Ubuntu 64 bits -tested on 14.04-
Ubuntu is pretty straightforward when it comes to connecting to a regular vpn server with a clear and easy menu in the right of the main Ubuntu toolbar.
Setting up Network Connect from Juniper requires software from Juniper and as a result is a completely different beast.
There is already documentation out there to install Juniper on Ubuntu but I still struggled as some steps either did not work and were not exhaustive or descriptive. I hope this tutorial will help in this regard.
The following guide starts from a fresh Ubuntu install, though it is not required obviously.
##Install java and plugins

As we use Ubuntu 64 bits, we will first install Java7 64 bits as well as plugins for your browsers (Chrome, Firefox)
tester@tester-VirtualBox:~$ sudo apt-get install openjdk-7-jdk icedtea-7-plugin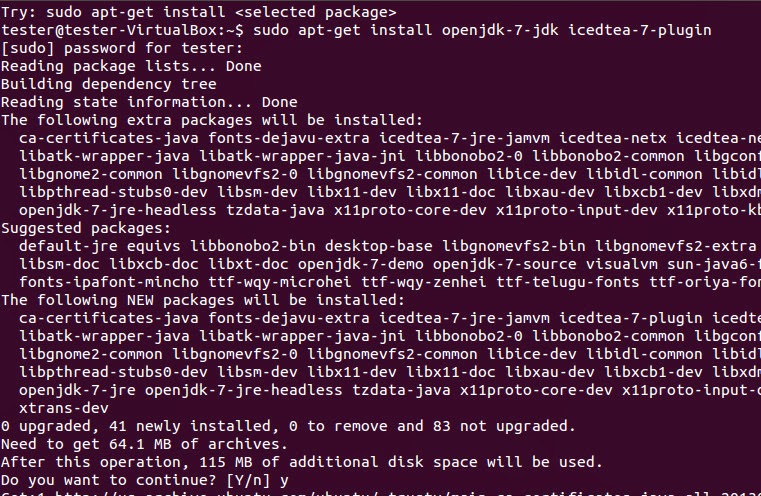
Now check that you have correctly installed a java 64 bits version:
tester@tester-VirtualBox:~$ java -version
java version "1.7.0_55"
OpenJDK Runtime Environment (IcedTea 2.4.7) (7u55-2.4.7-1ubuntu1)
OpenJDK 64-Bit Server VM (build 24.51-b03, mixed mode)

#Juniper needs a Java 32 bits version to run:
tester@tester-VirtualBox:~$ sudo apt-get install openjdk-7-jdk:i386

#Check all your installed versions:
tester@tester-VirtualBox:~$ update-java-alternatives -l
java-1.7.0-openjdk-amd64 1071 /usr/lib/jvm/java-1.7.0-openjdk-amd64
java-1.7.0-openjdk-i386 1071 /usr/lib/jvm/java-1.7.0-openjdk-i386
amd64 stands for 64 bits and i386 for 32 bits version Your default java version is still the 64 bits (you can recheck with
java -version)
##Download Juniper software from vpn site


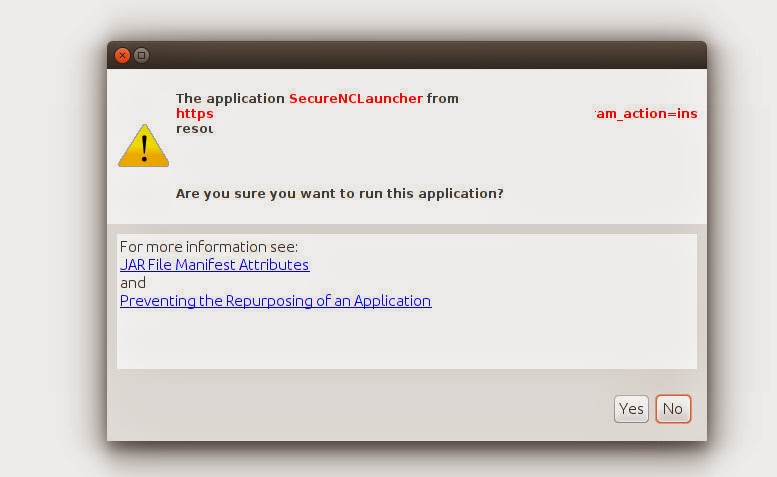
Be sure to accept Java warning which may appear just below or above the search toolbar while the page is showing “Please wait progress bar”.
Eventually download/accept the file shown on the last applet and you will be prompt with something like:
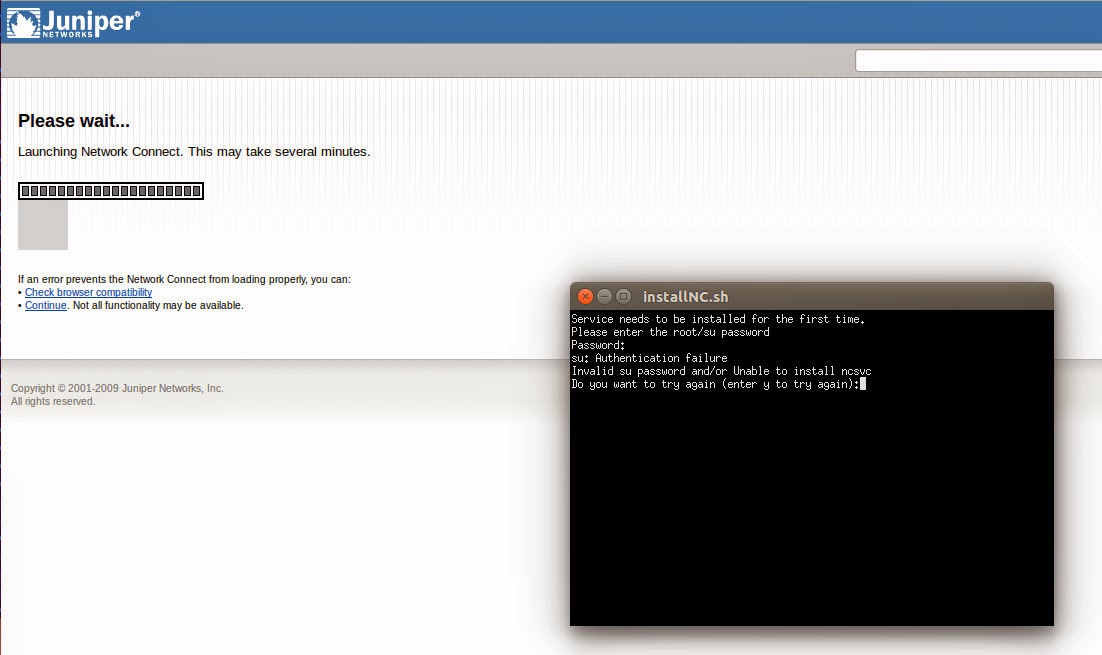
You won’t be able to enter your password as Ubuntu does not have root password. By entering once and then exits by Ctrl+D, the software is still downloaded which was our goal here.
Check that the following folder exists: ~/.juniper_networks/network_connect/
##Download https certificate Not that I did not have to do this step with Linux Mint
Click on the lock -I use firefox but Chrome as also certificates option in the settings-

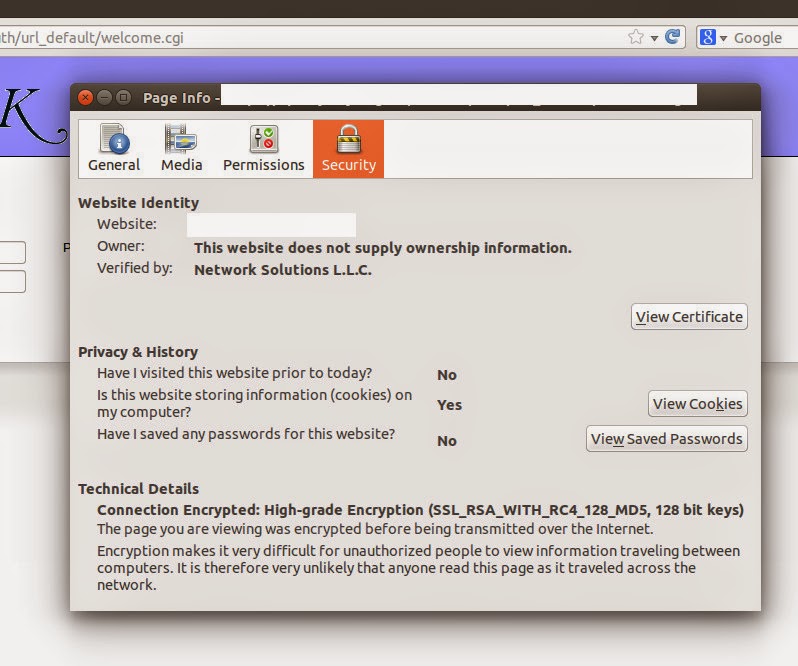
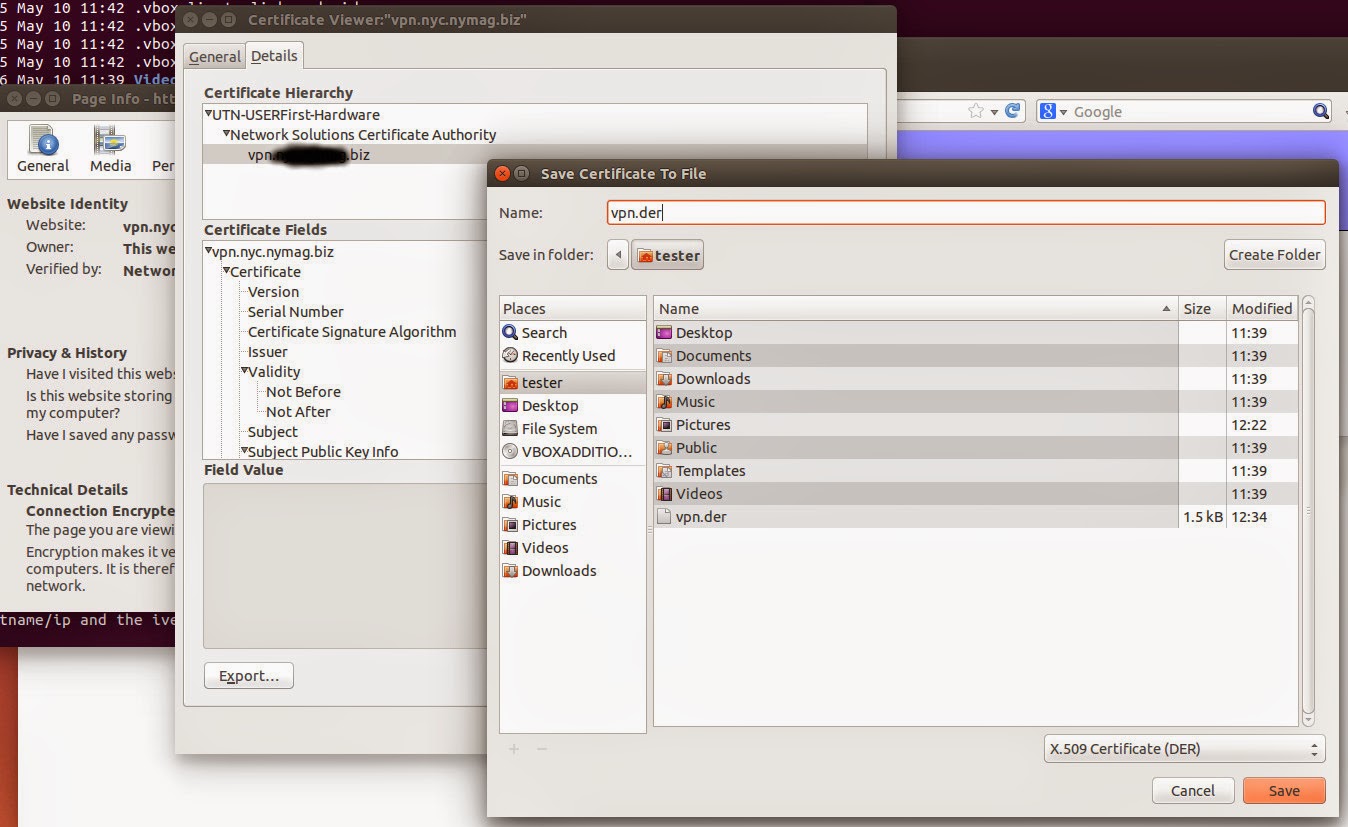
Be sure to select the certificate at the vpn url level (not at the root of the tree) and export it as a .der
##Additional dependencies
#Install 32 bits libs:
tester@tester-VirtualBox:~$ sudo apt-get install libc6-i386 lib32z1 lib32nss-mdns
#Install perl dependencies
tester@tester-VirtualBox:~$ sudo apt-get install libgtk2-perl libwww-perl
#Download madscientist script:
tester@tester-VirtualBox:~$ wget -q -O /tmp/msjnc https://raw.github.com/madscientist/msjnc/master/msjnc
tester@tester-VirtualBox:~$ chmod 755 /tmp/msjnc
tester@tester-VirtualBox:~$ sudo cp /tmp/msjnc /usr/bin
#Executes the script:
tester@tester-VirtualBox:~$ msjnc
it is not required for you to read it: http://mad-scientist.us/juniper.html
##Find realm type
Open the vpn login html page (like ../dana-na/auth/url_default/welcome.cgi)
Right click -> view source, then search for the text “realm”
It should look like:
<input type="hidden" name="realm" value="Users">
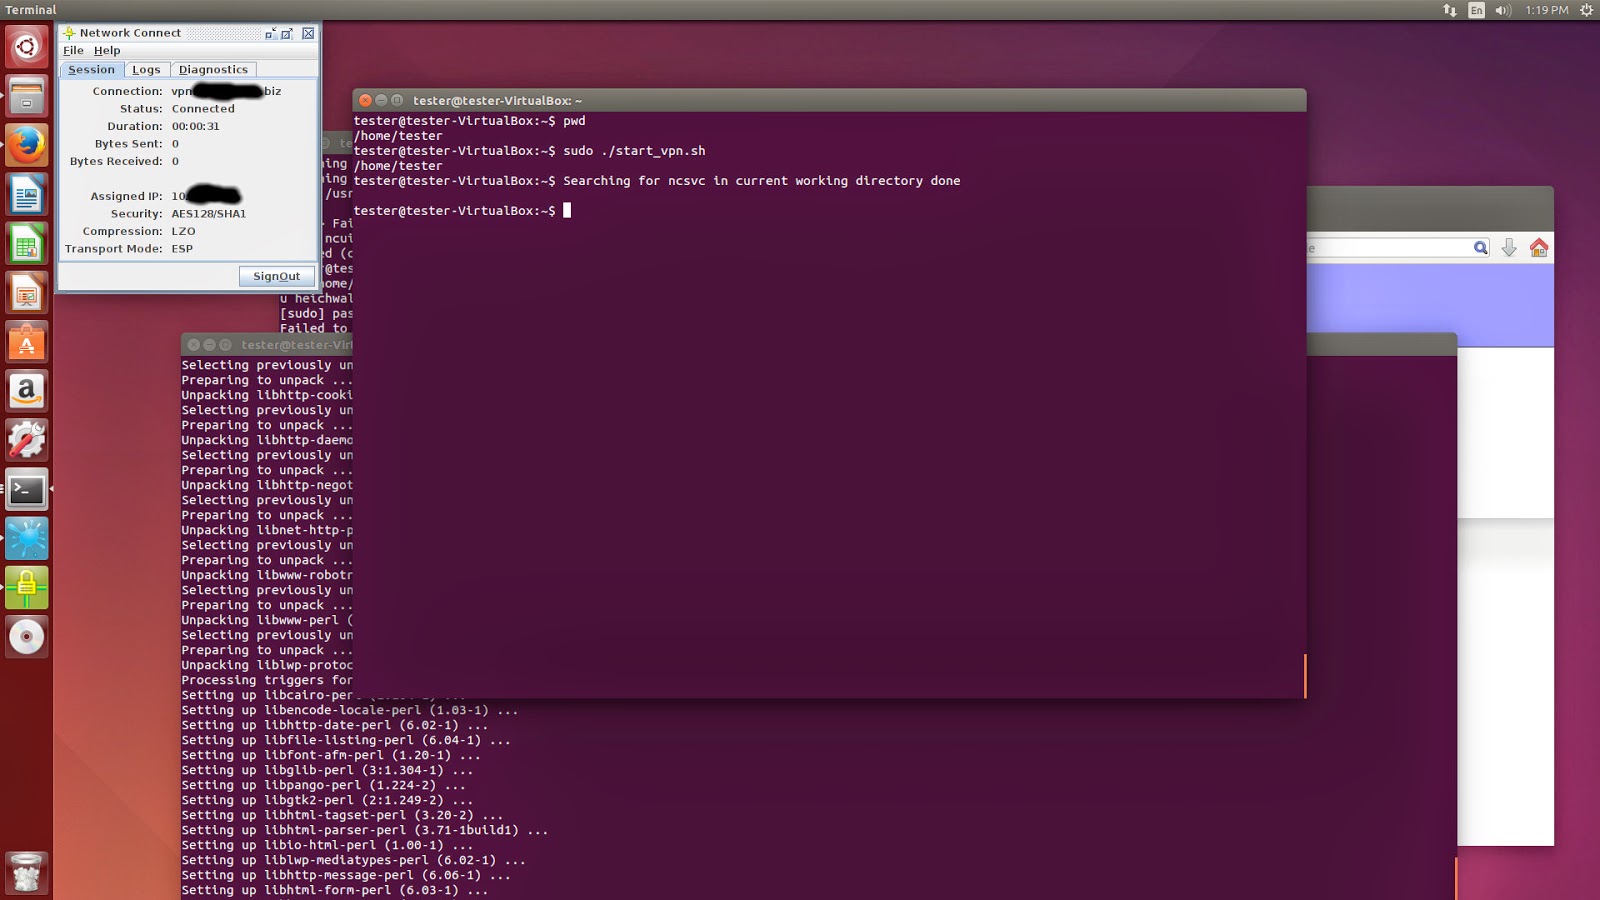
##Final scripts
I did not have to do this step with Linux Mint as the command msjnc correctly opens a dialog where you can enter credentials information.

Be sure to choose the i386 java (32 bits)
###Troubleshooting IVE errors type when trying to connect: Your certificate is wrong, try to export it again (try different browsers or different types (it worked for me with DER extension
###DNS resolution note
When connecting to the vpn, you dns resolution might be altered.
If you manage to ping the ip, but the name of the host is not resolved, you may want to check /etc/resolv.conf
Additional name servers and search domain names must have been written to the file. You may need to remove nameserver 127.0.1.1 or change the name servers order.